
It’s the most wonderful time of the year! It’s time to get out the tree and fill your home with all the holiday cheer. I personally enjoy decorating my home for the holiday season from fall all the way through the new year. I also like to use the decor I have while adding a new thing or two each year and changing up how my place looks each year for the holidays.
This year, I am decorating my new place for the holidays for the first time, and while I did buy a few new things (some on super sale at the end of the last holiday season), I also used some of the things I already had to DIY a few new additions this year. These are fast and easy.
- Ribbon and Bows on the Kitchen Cabinets
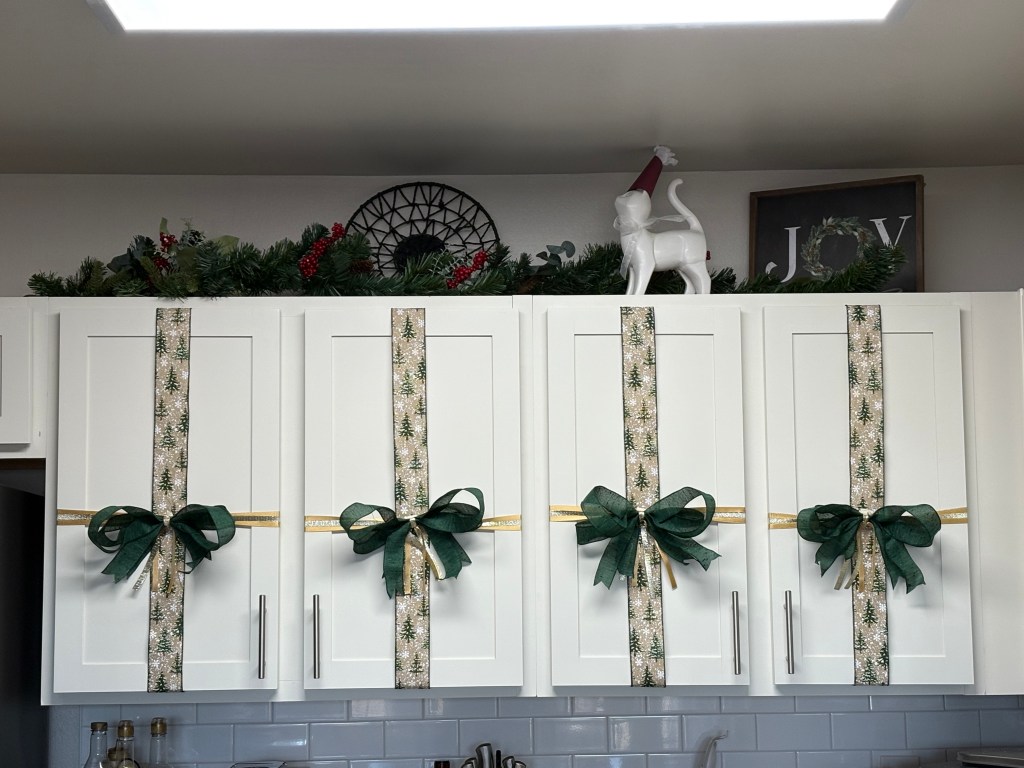
If you are like me and have watched many Instagram Reels to get inspiration for Christmas decor, then you know that there were several reels where the kitchen cabinets were decorated using ribbon, small wreaths, and other seasonal cheer. This year, I decided to give it a try, and I am so glad I did.
To do this, first you will need some ribbon. I got my ribbon from Michaels, but you can use any ribbon that you would like. I do recommend using wider, wired ribbon to give it the desired look. I put the links to the ribbons that I used below:
Christmas Tree Ribbon – https://www.michaels.com/product/25-x-20ft-snowy-trees-faux-linen-wired-ribbon-by-celebrate-it-10783230?michaelsStore=1367&inv=15
Green Linen Ribbon – https://www.michaels.com/product/15-x-30ft-green-faux-linen-wired-ribbon-by-celebrate-it-10783294
Gold Shimmer Ribbon – https://www.michaels.com/product/38-x-30ft-gold-shimmer-ribbon-by-celebrate-it-10784433?michaelsStore=1367&inv=19
Gold and Silver Ribbon – https://www.michaels.com/product/38-x-30ft-champagne-cream-metallic-ribbon-by-celebrate-it-10784246?michaelsStore=1367&inv=11
In addition to the ribbon, you will also need some floral wire (or something similar) and something to attach it to the cabinets. I used masking tape to prevent any damage and ensure that the ribbon stays on the cabinets until after the holidays.
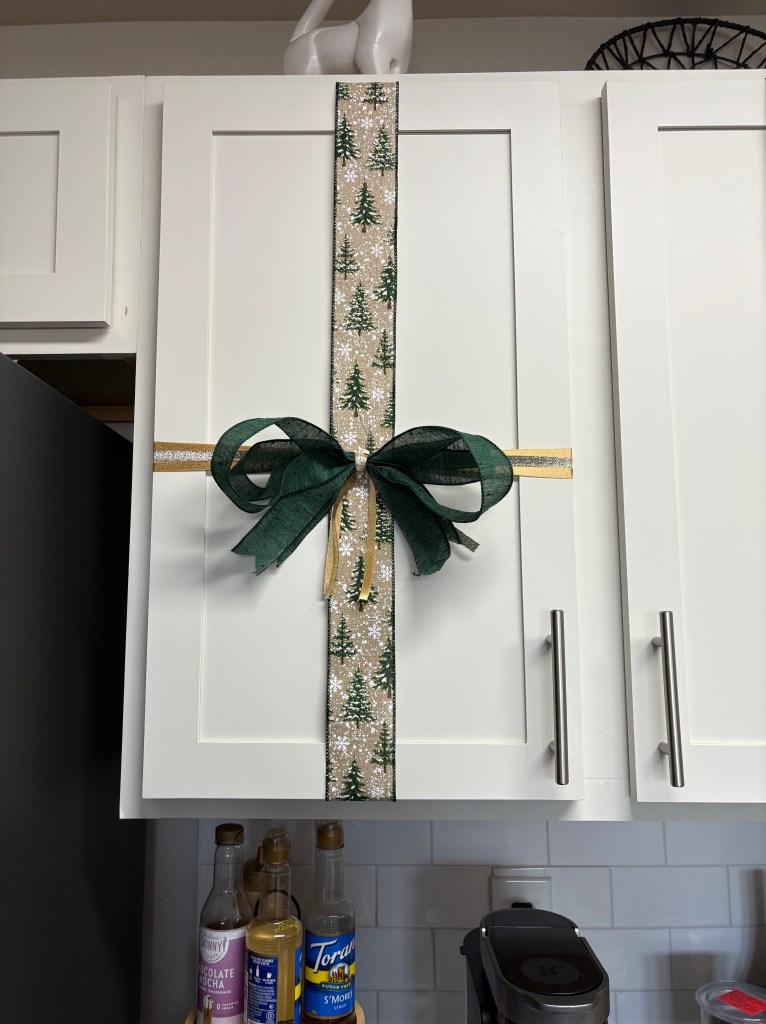
To create the bows, I used the green ribbon to create the bows. I created two bows for a double-layer effect. I also used some of the gold and shimmery ribbon to add some accent to the green bows. Using the floral wire, I secured the bows and tied the gold ribbon. I left a little excess wire to tie the bows onto the doors.
Next, I used the Christmas tree ribbon to measure how much I would need to apply to the cabinet doors. Once I determined how much I needed, I cut a piece for each cabinet door. Then, using some of the masking tape, I placed the ribbon on the door, using a piece of tape to secure each side to the inside of the door (don’t worry, you won’t really notice the tape unless the doors get left open…).
After placing the Christmas tree ribbon, I placed three strands of the gold ribbon across to create a luxury effect, but it is easier to use wider ribbon. I also used some masking tape to secure this to the inside of the cabinet door.
Finally, I attached the bows at the intersections of each ribbon and added a little tape for extra security. This leaves some beautifully decorated cabinets that will last the entire holiday season.
2. Christmas Gift Wall Art

This is a very simple, but festive piece to add to your decor. It is also something that could possibly even be done for free since many of us already have these items.
To do this, you will need a picture frame; I like to use the medium and large sizes, but any size will work, some wrapping paper, tape, and bows (optional).
First, remove the glass from the frame and store it somewhere safe or throw it away. Next, take the backing of the frame and remove it from the picture frame. This is what will be used for the paper and bows.
Once the backing is removed, measure the wrapping paper. You can use any wrapping paper you want. Note that you will only need it to slightly cover the back for easy taping. After measuring, cut the wrapping paper and cover the front of the backing, and attach it using some tape on the back. Once the paper is attached to the backing, replace the backing into the frame and secure it.
Finally, add the bow(s) and hang the finished piece on the wall. I used the one I made to cover my TV cords and fill some space on the wall between the table and TV. I use mine year-round and just change the paper.
3. Holiday-themed Light up Jars
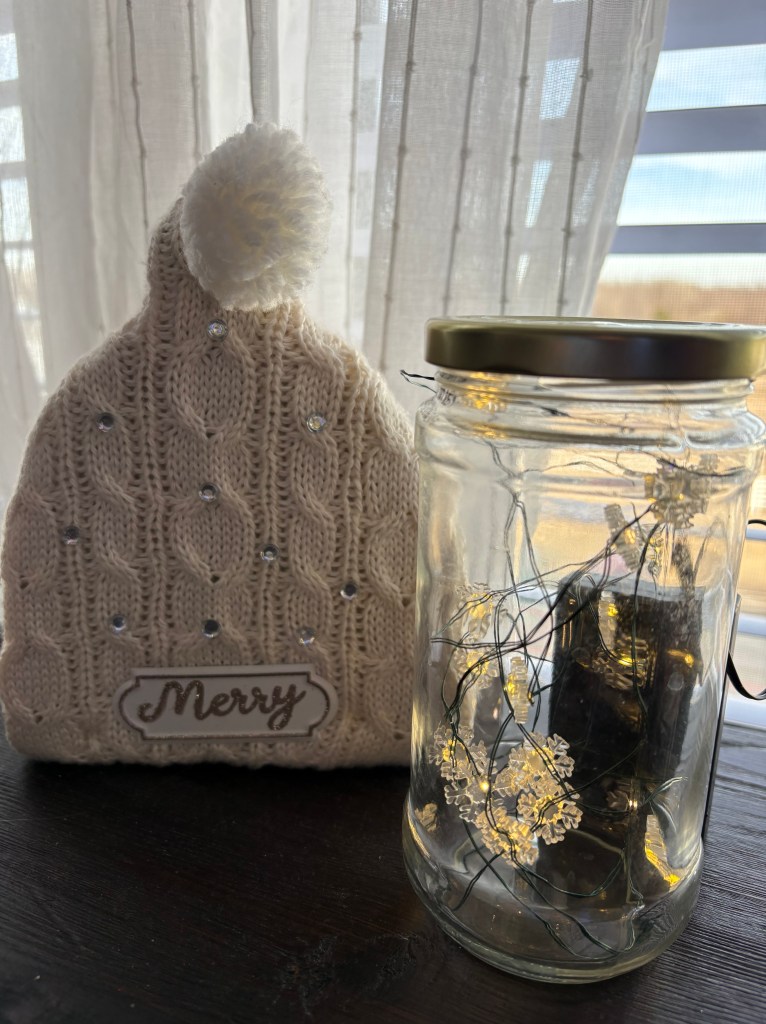
One more DIY holiday decor I did was these lighted jars. I used some battery-powered Christmas lights and cleaned pasta sauce jars that I recycled to use in projects. These are super cozy and can be part of the decor all winter long!
To do this, you will need a jar. It can be any size that you want, but I find the size of the pasta sauce jars to be the best. If you are recycling a jar that you already have, ensure it is clean and fully dry before adding the lights.
Next, add the lights. I used these snowflake-shaped fairy lights to add a cozy touch to my living room space. I shaped them how I wished and I lightly put on the lid. Make sure the lid is not too tight, or it could damage the lights.

I hope that I brought more inspiration for decorating your home this holiday season or even next year. Let us know down below, and we have social media pages on Instagram @patchcostudio and on Pinterest!
Have a lovely holiday season!

Leave a comment