

As part of our DIY decorating series, this is a great way to display cloth pieces without damaging them from holes or tears.
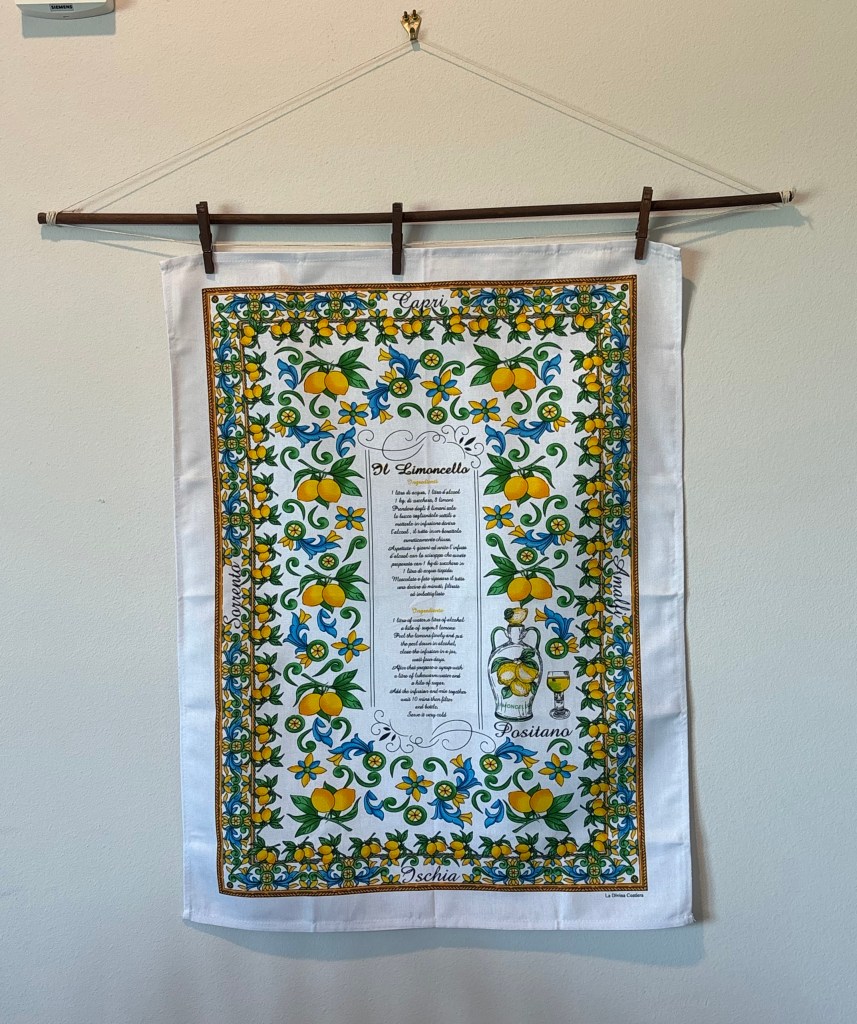
I recently received this beautiful tapestry from my Umma who went all the way to Greece on a trip this summer. It is so bright and beautiful that I wanted to hang it up, but I did not want to poke any holes in it with thumbtacks or nails. The next thing I know, I am searching for a tapestry hanger on Amazon and at Target, but they ultimately did not have quite what I was looking for. Not to mention, tapestry hangers are expensive. Then, the lightbulb turned on. I was like hey why not make my own? So I went to Michael’s, got my supplies, and created this. Now I want to tell everyone how I made a tapestry hanger for less than a cup of coffee at Starbucks.

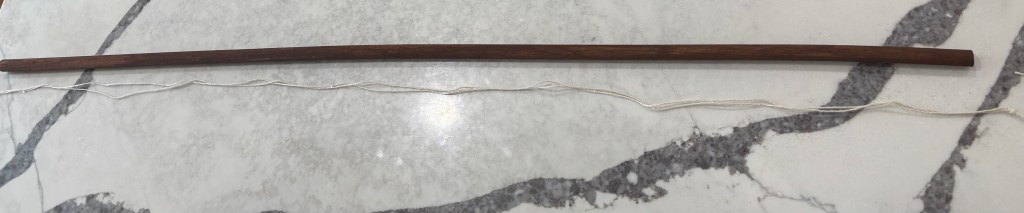
First, you will need a wooden dowel, I got the one in the picture at Michael’s for about $2 and I also went ahead and got the color paint I wanted for $1.50. I chose brown for a natural stained wood look, but you can choose whatever color you want. You will also need some twine or very thin rope, clothes pins or clips, a hot glue gun, and painting supplies. You may need a bigger piece of wood and/or a heavier duty rope if your tapestry is large and/or heavy.
Next, I looked at the wooden dowel and realized it was just a little bit rough and needed to be sanded. I borrowed a piece of sandpaper from a family member and was able to smooth out the wood for better painting. After sanding, I applied paint to my piece of wood. I had acrylic paint so I watered it down a little so it would resemble a wood stain. I also painted the clothes pins that I planned to use so it matches. Once everything was painted, I gave it some time for everything to dry.

Later, once everything was dry, I plugged in the hot glue gun and took my twine. I had a very thin twine so I doubled it up to make it a little sturdier. I measured using the wooden dowel and cut double the length for where the clothes pins would hang the tapestry. Next, I tied a small knot on one end to keep things even and glued it to the edge of the wood. I then applied the other end of the twine to the other side. It is important to note that you want this to be sort of tight but not too tight.
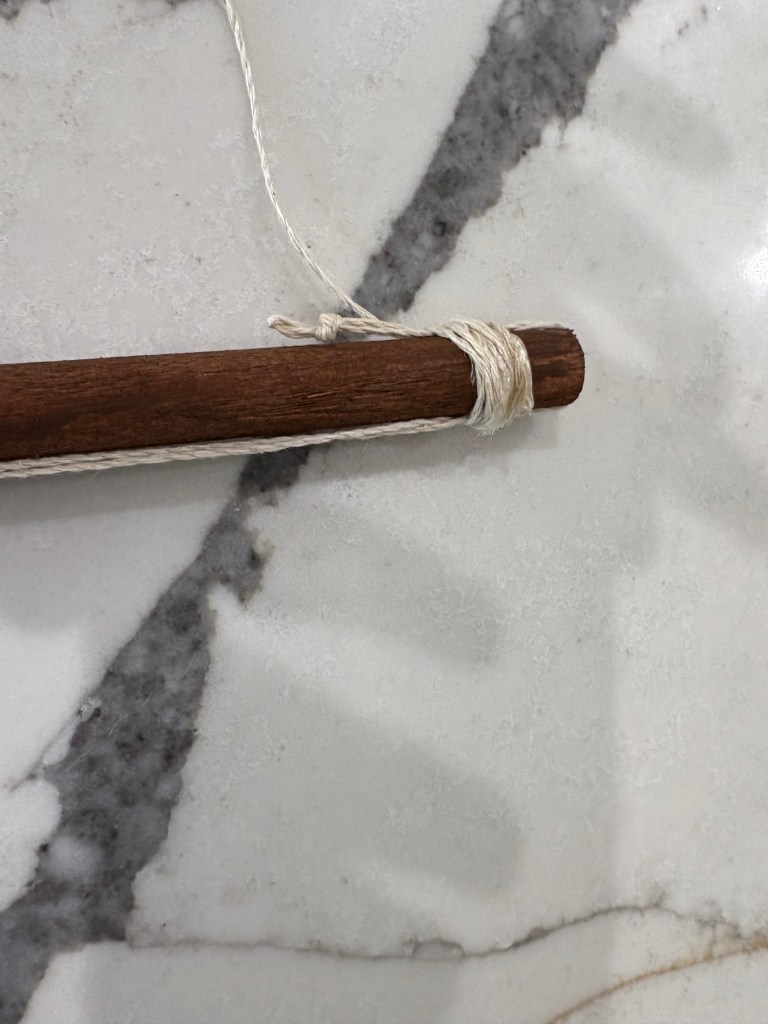
For the last step, I made the part that would be hung on the wall. To do this, I took some more twine and wrapped it several times around one end of the wood. I ended up doing this about 10 times, but if you have a thicker piece of rope, you may not need to do this as many times. I glued the ends down with hot glue for stability. I gave a little slack for hanging, wrapped the other side and glued it. Pro tip, use a little extra glue to ensure that this will hold your piece on the wall. Once everything is dry, it is time to hang it up!

I was amazed with how great this turned out. Who knew you could make something like this with some wood and twine? Once I got the tapestry hanger on the wall, I realized that I had some wall decals that complimented the tapestry nicely. I took the decals and placed them on the wall next to the tapestry to give things a more completed look.
This is a great way to add something unique to an otherwise blank wall. It is very affordable, dorm-room friendly, renter friendly, and great for homeowners as well.
I hope that you have enjoyed reading this! Check out our other posts on our website along with inspiration posted on our Instagram and Pinterest both @patchcostudio.

Leave a comment